Cooking a Whole Hog
Today we’re talking all about cooking a Whole Hog! And smoking a pig is easy… just as long as you have a pit that can handle the job and a few buddies to help with the heavy lifting. You can turn out a hog that will rival the best whole hog joints in the country.
The most important piece of equipment you’ll need is a pit large enough to accommodate the hog. There are many styles of hog cookers out there from homemade brick pits to custom hog rotisseries; I’ve found that the best hog cookers are ones that require the least amount of effort to maintain cooking temperature.
This allows you to concentrate on the flavor and tenderness of the hog instead of fighting a fire all day and night. For cooking a Whole Hog I’m using a Double-Wide CTO from Ole Hickory. It’s designed to hold a hog with ease and will run on a basket of coal for 8 hours without even flinching.
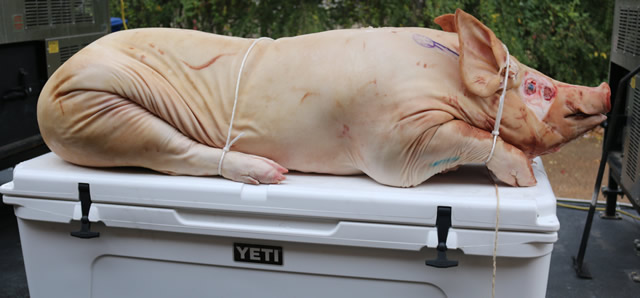
Once you have your pit, you’ll need to source a whole hog. Most butchers can order hogs but they’ll need plenty of advanced notice. You can also talk with local farmers; this is where you’ll find the specialty breeds – which taste way better than commodity hogs.
It takes a full day to properly prepare and cook a whole hog, so give yourself plenty of time.
The first step in the process is trimming the hog. I use several sharp knives, an electric handsaw, and a dremel with a straight blade.
First move the hog to a sturdy table. Lay the hog back side down, feet up in the air. Spread the legs apart slightly and make a guideline inside the cavity from the top of the backbone all the way down the spine.
Use the dremel and follow the line down the spine slowly cutting through the bone. Now come back with the handsaw to cut through the rest of the bone, be careful not to puncture through the skin. With the spine split the hog is ready to butterfly open. You’ll need to put a little pressure on each shoulder and ham to dislocate the joints.
Now we want to remove the skirt meat and the first 3 or 4 rib bones so we can expose the shoulders and more of the belly. Just take a sharp knife – starting at the skirt – and trim it away from the spare ribs. Keep going up the side and underneath the first few ribs.
Use the dremel to free the ribs from the spine; it will come out all in one, big piece – exposing the shoulders. This way we will be able to make more bark on the shoulders and on the belly meat.
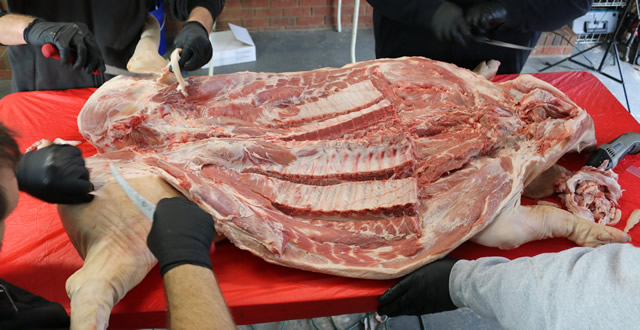
We want the ribs to lay flat while cooking a Whole Hog – so they don’t curl up during cooking, and we want to separate the spare ribs from the loin ribs. Make a guideline in between the spare and loin ribs. Then make another line at the bottom of the spare ribs to remove the knuckles.
Use the hand saw to knock off the knuckles. You can trim those away with a knife. Then use the saw to separate the spare ribs and loin ribs. This will give you access to the loins.
At this point it’s time to clean up the meat. Use a sharp knife and just start removing anything you don’t want to eat. Silver skin, fat, tough connective tissue – all this stuff is a barrier from your seasonings and smoke. And we want it gone. Take the time to trim each shoulder, the neck area, the belly and the hams.
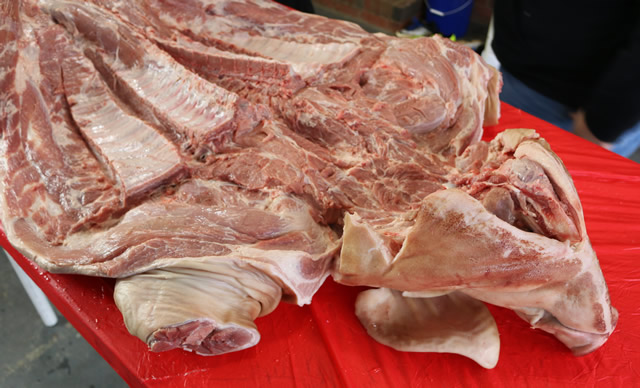
The last step in the trimming process is removing the legs so the hog fits better on the rack. This is pretty easy – just use a sharp knife to score the meat just above the knee joint. Then come back with the hand saw to go through the bone. Finally rinse the cavity with cool water to remove any bone fragments and pat dry with paper towel.
Now you need to think about how you’re going to get the hog to the smoker. I’m using a special hog rack called the “Lazy Suey” It’s designed specifically for Cooking a Whole Hog. This rack makes loading the hog easier and it’s simple to rotate during the cooking process.
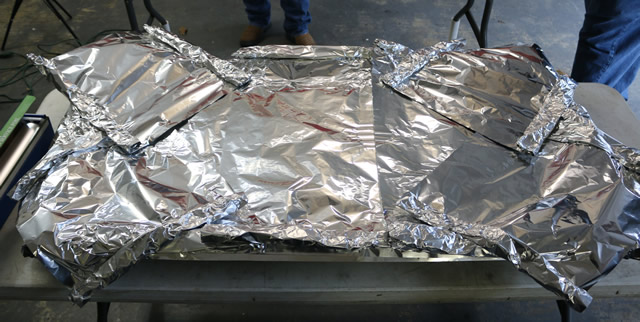
Before placing the hog on the rack, we stage the aluminum foil that we’ll use later for wrapping. Tear off long strips and overlap them on the rack. Overlap several strips running the length of the hog; then overlap several running across the rack. Roll the excess foil down on each side so it’ll be easy to access later when we’re cooking a Whole Hog. We also stage a little extra foil for each shoulder and ham.
With the foil in place the rack is now ready for the hog. Carefully slide it over onto the rack. Make sure it’s centered and on top of the foil.
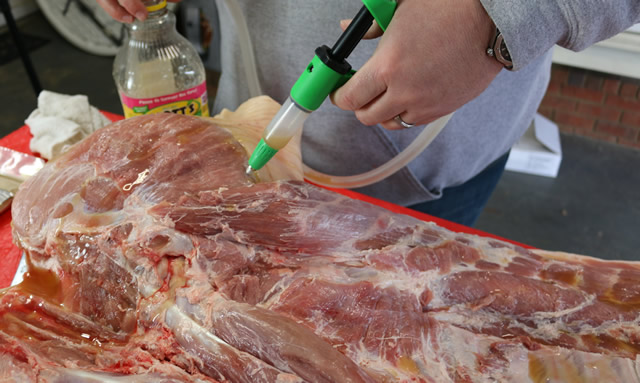
The seasoning process starts with injecting. You can use any pork injection you like or something as simple as apple juice. You’ll need about 2 gallons for a 150# hog. We used Victory Lane Pork Injection for this hog.
Spread the injection sites out about an inch apart over the entire hog. Key in on areas like the ham, loin, belly, underneath the ribs, and shoulders.
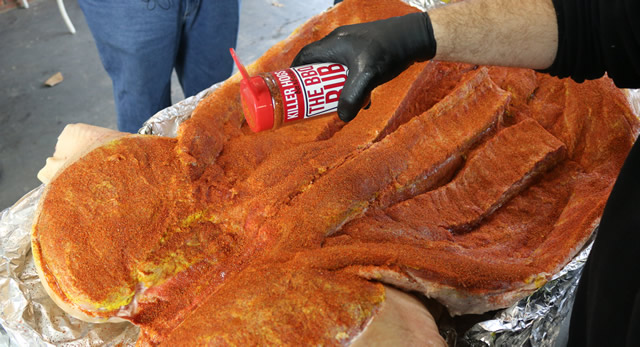
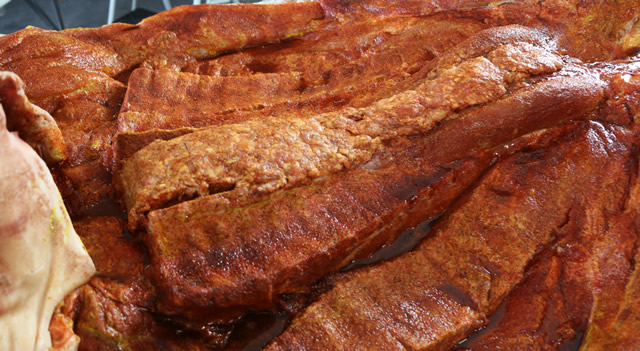
When it comes to the dry seasoning, I say use whatever rub you like. This is how I do it: The first layer is a good dose of Salt, Black Pepper, and Garlic – my Killer Hogs AP Rub works great here. Then rub a thin coat of yellow mustard over the meat surface to help the rubs stick.
For the next layer I like to use a spicy rub to add some heat – Killer Hogs Hot Rub. Then the last seasoning is for color and a touch of sweetness – Killer Hogs The BBQ Rub. It may seem like a lot of seasoning but remember there’s a lot of hog here, so it needs a good dose of flavor.
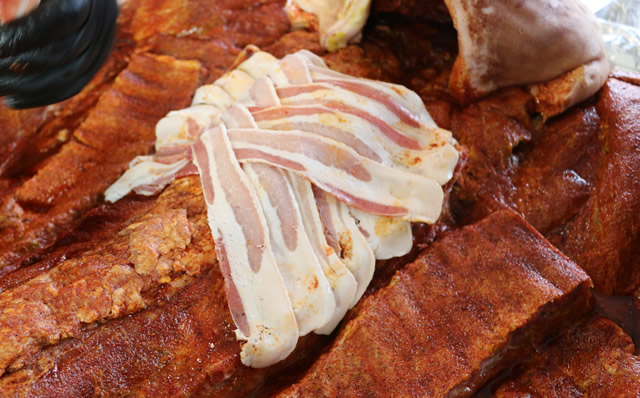
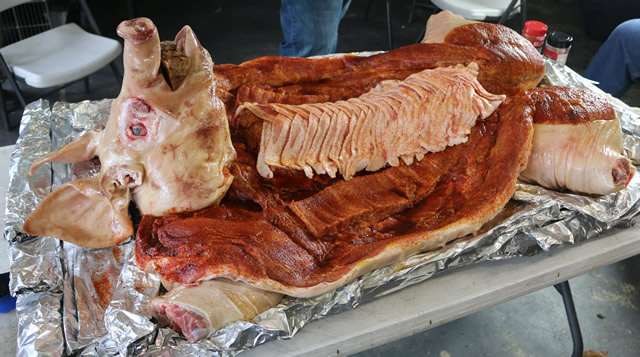
The loins of the hog tend to cook faster than any other area, so they need a little extra mass (insulation) to slow down the cooking. For this you can stuff breakfast sausage down the backbone and top it with thick slices of bacon. Not only does it insulate the loins, but as it cooks, you’ll get extra flavor.
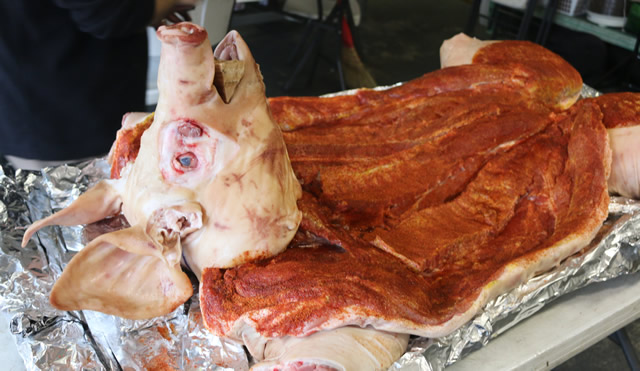
The hog is almost ready for the pit now. Before it goes on spray the skin down with vegetable oil (cooking spray works great) and add a little extra foil around areas of the skin that are exposed (head, shoulders, and hams). Of course we want the meat to taste great but a big part of cooking a Whole Hog is the presentation; so take the time to protect the skin.
Now you can fire up the pit and load the hog. It’s easiest to maneuver the hog on a cool pit, so we load it first then add the fire. We’re cooking a Whole Hog at 225⁰ until it reaches 190 in the shoulders – which should put the hams in the 180 range.
This whole hog is done when it’s done, so don’t plan on rushing things.
For the first 6 hours smoke the hog with your favorite wood. I like a blend of hickory, cherry, and pecan.
Every 1 ½ hrs the hog gets basted to prevent it from drying out. The baste I use is simple:
Hog Baste Recipe:
- 32oz Italian Dressing
- 32oz Hot Tap Water
- ½ cup Killer Hog’s The BBQ Rub
- ¼ cup Soy Sauce
- ¼ cup Worcestershire Sauce
After 6 hours it’s time to wrap the hog. Unroll the staged aluminum foil and drape it over the hog. This is where the hog rack comes in handy. It’s easy to spin around and get to both sides.
The foil should be joined together and tucked down tight around the hog. Before closing the wrap, be sure to place a probe thermometer in the shoulder and ham.
At this point all you have to do is maintain a constant cooking temperature. Add charcoal as needed and Keep the Door Closed.
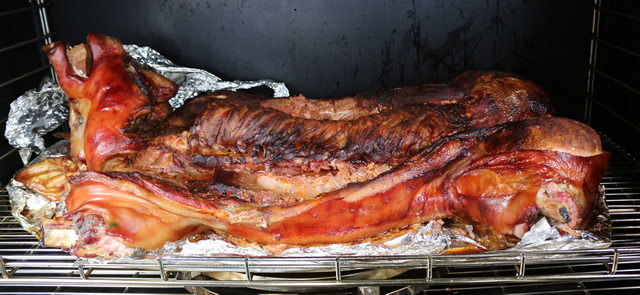
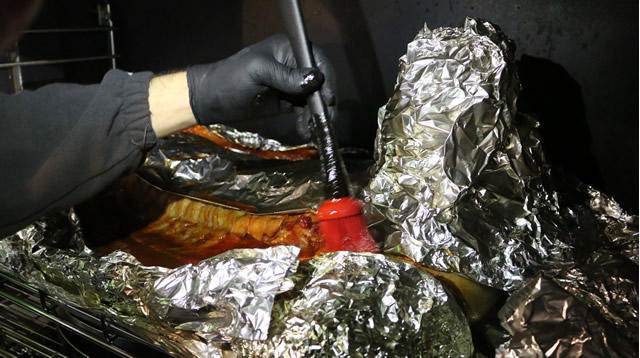
Once the target internal temps are reached, open the pit and remove the foil. There will be excess moisture in the cavity; dip as much out as possible.
To set a bark on the hog apply a light coat of dry rub over the meat, close the doors and continue cooking a Whole Hog for 10 minutes.

For the glaze I use warm BBQ Sauce thinned with a little apple juice. You can use your favorite sauce or glaze here, but for this hog we used Killer Hogs The BBQ Sauce. Brush it on the bark and continue to cooking a Whole Hog for 20-30 minutes to set the glaze.
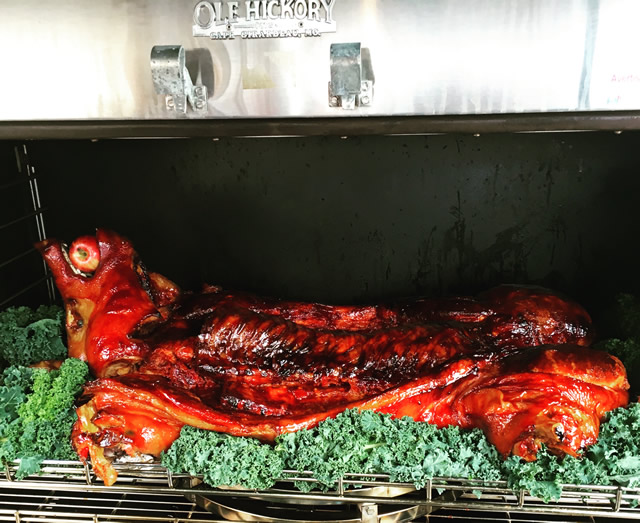
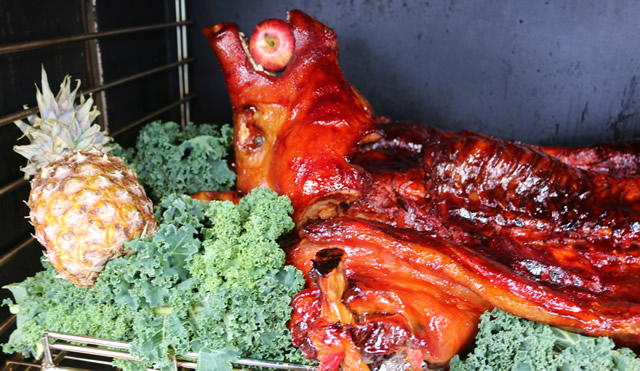
The hog is completely cooked at this point. To make it look good you can garnish the outside with bunches of Kale and as much extras as you like.
This is when you want to show off your hard work, so make it look good and let folks take pictures before you start breaking it down.
You can expect a hog this size to yield about 75lb of cooked barbecue. A big part of cooking a whole hog correctly is taking the time to trim it properly and cooking it at a steady temperature until it’s done.
Now that you know how we do it, you’re ready to cook your own whole hog.
Malcom Reed
Connect on Facebook
Follow me on Twitter
Subscribe to my YouTube Channel
Find me on Google+
Follow me on Instagram
cooking a whole hog
Have a Question About This Recipe?
Connect with us in our HowToBBQRight Facebook group for recipe help, to share your pictures, giveaways, and more!