
Baby Back Ribs Recipe – Competition-Style Recipe
If you want to produce high-quality Baby Back Ribs Recipe, you MUST start with a good quality product.
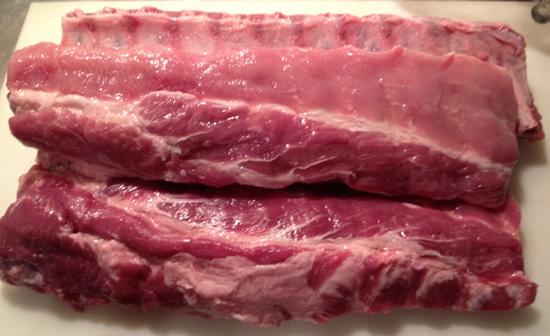
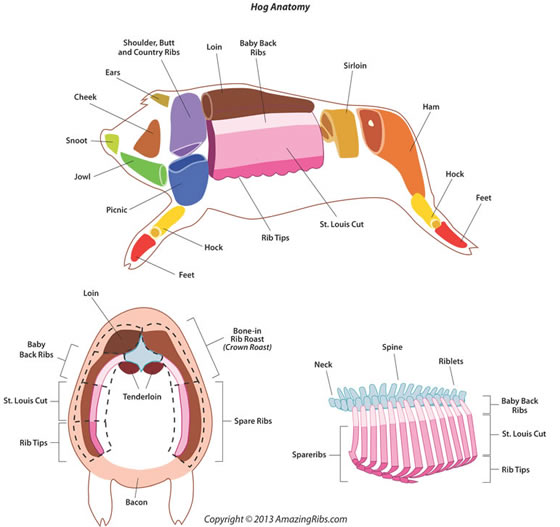
I start with a slab 2 ½ lb and down Baby Back Ribs (also know as loin back ribs). You can also cook St. Louis Style (spare ribs) with this same method.
My Baby Back Ribs come from a local butcher. He selects the best slabs from his inventory and puts them to the side.
If you call ahead of time and tell them what you are looking for, most butchers don’t mind doing this. It never hurts to make friends. (a little gift of bbq goes a long way).
Some butchers will even trim the ribs for you for free. I try and remove any bone fragments or end pieces that don’t look right.
You want a perfect looking slab before putting any rub or seasoning on the meat. Good product going in equals good product coming out.
First off, Remove the membrane from the Baby Back Ribs…
I always remove the membrane. It will affect your tenderness if you don’t and if you are competing, it is what the judges expect.
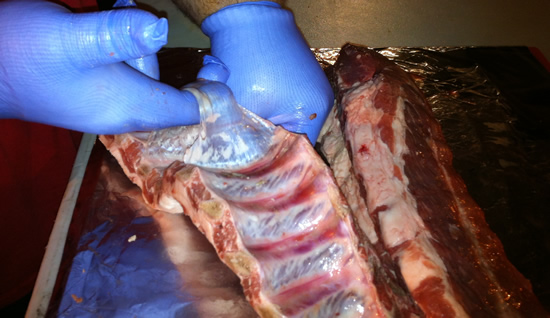
You want to remove the membrane on the back of the ribs first. To do this, use the pointed end of a small knife and insert it very carefully underneath the membrane. Make sure you don’t cut too deep into the meat. You want to lift the membrane up slightly just enough to get a finger underneath.
Once you can work your finger under it, carefully work across the slab trying not to tear the membrane. Now that you have pulled the membrane enough to get a grip on it, pull it all the way off the slab.
Now wash the slab of ribs and pat dry with paper towel.
The next step is to apply a good quality dry rub to your Baby Back Ribs
You can use any dry rub that you like. But we always use our own recipe Killer Hog’s The BBQ Rub.
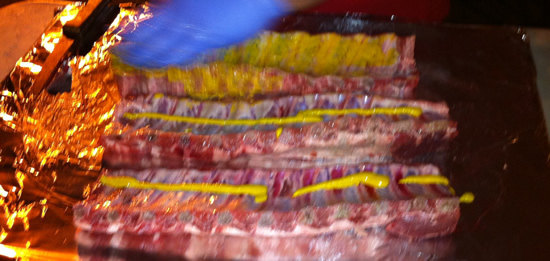
To get the rub to adhere to the meat I use a light coat of yellow mustard, then sprinkle on the rub. You don’t have to massage the rub into the meat. Just stack the slabs on top of each other and place them in a large aluminum pan or XL Ziplock bag for a short rest. I like to give the ribs a little time to draw in the flavors of the dry rub.
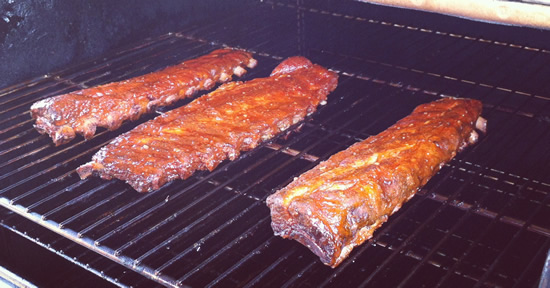
Now you are ready to smoke your Baby Back Ribs…
When you are ready to smoke the ribs, you want to get your smoker up to 225 degrees and add a few chunks of cherry wood. I normally use 4 to 5 chunks to start. You should have a light blue smoke coming from the smoker.
Any more will be too harsh for the meat and produce a bitter end product. When the smoker is up to temperature, place the ribs on the racks.
Note the time: This process is crucial. Cooking the perfect slab of ribs is all about timing and proper temperature.
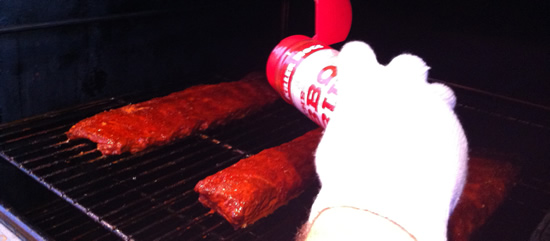
After 1 hour of smoke it’s time to baste the Baby Back Ribs…
This is the baste recipe that I use to mop on the ribs. It will keep the meat nice and moist during the cooking procedure.
- 16 oz Vegetable Oil
- 16 oz Cider Vinegar
- 32 oz water
- 1 cup of dry rub
- 2 TBS Worcestershire
- 2 TBS Soy Sauce
You want to mop them every hour and remember to add another 4 or 5 chunks of cherry wood as needed.
After two hours of smoke, remove the ribs from the smoker…
At this point the ribs have taken on as much smoke flavor as they are going too. Continuing to cook them uncovered will create a flavor on the outside that no one likes. It’s almost as if you cooked them over lighter fluid, and you know how bad that can be.
This is why I wrap the ribs after two hours. Not only will wrapping help break down the fat and create the perfect tender slab, but it will also prevent that foul, over-smoked taste.
Here’s what I do:
First prep a table for wrapping. Have the baste and rub handy and pull off enough sheets of aluminum foil for each rack of ribs. I do this so I’m not wasting any time once the ribs come off the cooker. It’s important to be as quick as possible, and thinking ahead will speed up the process.
Remove all of the ribs from the smoker and place them stacked in a large aluminum pan.
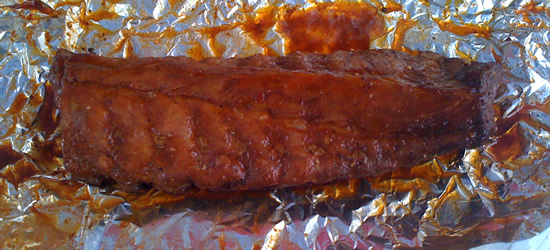
Doing one slab at a time, lay it on the aluminum foil and give it a quick mop with baste. Lightly dust with the dry rub. Flip the slab over and do the same for the opposite side.
Wrap the ribs tightly in foil and move on to the next slab. The process is simple, but try to do it quickly without puncturing the wrap. Once all of the ribs are wrapped, carefully transfer them back to the cooker.
The smoker temperature should still be 225 degrees. Tenderize the ribs for another 1-1/2 hours at this temperature.
After this point I like to check a couple of the racks. Sometimes there will be a few that are ahead of the game and they’ll need to come off the smoker.
The majority of the time it takes a full 2 hours to get them to the right tenderness. A perfectly tender rib should give a little. The meat will draw back from the edge of the bones, and when you tug on two bones the meat should start to separate.
Also, I’ll stick a toothpick into the meat to check for tenderness. It should go in easy almost like sticking a knife into warm butter.
After 2 hours, pull the ribs out and vent…
Caution: Allow some of the steam to escape the foil before unwrapping; it will be very hot!
Remove the ribs from the aluminum foil and place back on the smoker racks. If you’re ahead of schedule, it’s ok to rest the ribs in a dry cooler. Sometimes I allow myself a little extra time, so it’s perfectly fine to vent the foil, drain the juice, and hold for a short period. Then they go back on the rack for finishing.
To Finish your Baby Back Ribs:
Be careful at this point the ribs will be very tender and transferring them from the foil to the smoker is a delicate procedure.
If you are planning on cooking your Baby Back Ribs DRY:
You simply need to baste your ribs once more, dust more dry rub on the top and let your ribs sit on the smoker unwrapped for 25 – 30 minutes. That’s all to finishing a DRY RIB.
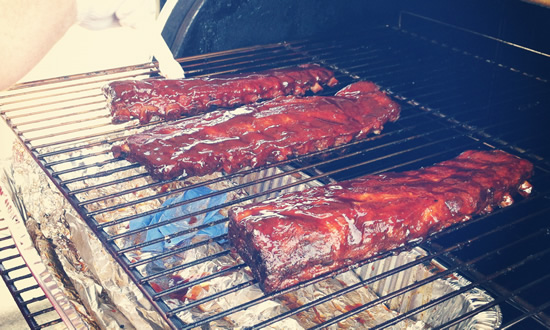
If you are planning on serving your Baby Back Ribs WET or MUDDY:
Gently brush on your finishing sauce (You can use any sauce that you like, but I like to use a sweet and spicy BBQ sauce for my finishing sauce).
I do this on both sides, but be careful when flipping the racks over. The key is to bake the sauce onto the ribs for 45 min to 1 hr.
The sauce also will have a tendency to burn if you don’t watch it very closely. You should be looking for a nice mahogany color – not black.
The sugar in the sauce will burn if you leave it on the smoker for too long. Normally I only go about 45 min at this time.
The ribs are now ready to come off the smoker…
Carefully remove the ribs from the smoker and place on a cutting board. I cut the ribs in two bone sections with meat on each side of the bone.
If you follow this procedure, then you will have BBQ you can brag about. It will blow any other BBQ out of the water, bar none.
Have a Question About This Recipe?
Connect with us in our HowToBBQRight Facebook group for recipe help, to share your pictures, giveaways, and more!